Creating a Secure and Scalable AWS VPC with Terraform
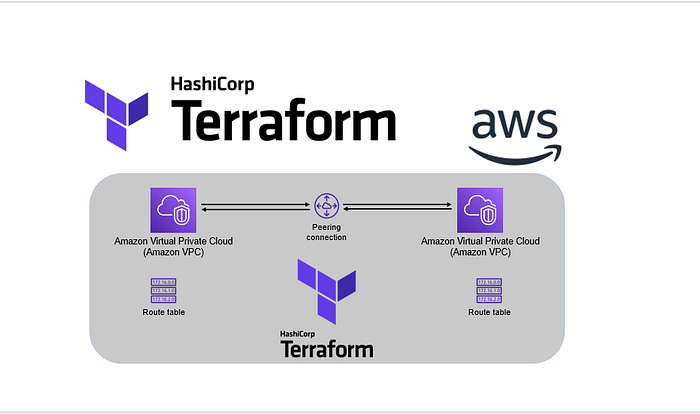
In this blog post, we’ll walk through the process of setting up a Virtual Private Cloud (VPC) on AWS using Terraform. This setup includes creating public and private subnets, routing tables, a NAT gateway, and security groups to ensure a secure and scalable network environment.

Prerequisites
Before we dive into the Terraform configuration, make sure you have the following:
- An AWS account.
- Terraform installed on your local machine.
- Basic understanding of AWS networking components and Terraform.
Terraform Configuration Breakdown
We’ll be creating the following AWS resources:
- VPC: The virtual network where our resources will reside.
- Subnets: Public and private subnets to separate different types of resources.
- Internet Gateway (IGW): Allows instances in the public subnet to access the internet.
- NAT Gateway: Provides internet access to instances in the private subnet.
- Route Tables: Direct traffic between subnets and the internet.
- Security Groups: Define inbound and outbound rules for instances.
Here’s a detailed breakdown of the Terraform configuration:
1. Define AWS Provider:
provider "aws" {
  region = "us-west-2"  # Change to your preferred region
}
This block specifies the AWS region where resources will be created. Adjust the region based on your requirements.
2. Create VPC:
resource "aws_vpc" "my_vpc" {
  cidr_block = "10.0.0.0/16"
  enable_dns_support = true
  enable_dns_hostnames = true
  tags = {
    Name = "my_vpc"
  }
}
The VPC will have a CIDR block of 10.0.0.0/16, allowing us to create a large number of IP addresses. DNS support and hostnames are enabled for easier management.
3. Create Internet Gateway:
resource "aws_internet_gateway" "my_igw" {
  vpc_id = aws_vpc.my_vpc.id
  tags = {
    Name = "my_igw"
  }
}
The Internet Gateway enables resources in the public subnet to access the internet.
4. Create Subnets
Public Subnet
resource "aws_subnet" "public_subnet" {
  vpc_id                  = aws_vpc.my_vpc.id
  cidr_block              = "10.0.1.0/24"
  availability_zone       = "us-west-2a"  # Change as needed
  map_public_ip_on_launch = true
  tags = {
    Name = "public_subnet"
  }
}
The public subnet is configured to automatically assign public IP addresses to instances upon launch.
Private Subnet
resource "aws_subnet" "private_subnet" {
  vpc_id                  = aws_vpc.my_vpc.id
  cidr_block              = "10.0.2.0/24"
  availability_zone       = "us-west-2a"  # Change as needed
  tags = {
    Name = "private_subnet"
  }
}
The private subnet does not have direct internet access.
5. Create Route Tables
Public Route Table
resource "aws_route_table" "public_route_table" {
  vpc_id = aws_vpc.my_vpc.id
  route {
    cidr_block = "0.0.0.0/0"
    gateway_id = aws_internet_gateway.my_igw.id
  }
  tags = {
    Name = "public_route_table"
  }
}
This route table directs all outbound traffic (0.0.0.0/0) to the Internet Gateway.
Private Route Table
resource "aws_route_table" "private_route_table" {
  vpc_id = aws_vpc.my_vpc.id
}
The private route table is initially empty. It will be updated to route traffic through a NAT Gateway.
6. Create NAT Gateway
resource "aws_eip" "nat_eip" {
  vpc = true
}
An Elastic IP (EIP) is required for the NAT Gateway.
resource "aws_nat_gateway" "my_nat_gateway" {
  allocation_id = aws_eip.nat_eip.id
  subnet_id     = aws_subnet.public_subnet.id
  tags = {
    Name = "my_nat_gateway"
  }
}
The NAT Gateway is placed in the public subnet and uses the Elastic
IP created above to provide internet access to the private subnet.
7. Update Private Route Table
resource "aws_route" "private_route" {
  route_table_id         = aws_route_table.private_route_table.id
  destination_cidr_block = "0.0.0.0/0"
  nat_gateway_id         = aws_nat_gateway.my_nat_gateway.id
}
This route directs outbound traffic from the private subnet through the NAT Gateway.
8. Associate Route Tables with Subnets
Public Subnet Association
resource "aws_route_table_association" "public_subnet_association" {
  subnet_id      = aws_subnet.public_subnet.id
  route_table_id = aws_route_table.public_route_table.id
}
Associates the public subnet with the public route table.
Private Subnet Association
resource "aws_route_table_association" "private_subnet_association" {
  subnet_id      = aws_subnet.private_subnet.id
  route_table_id = aws_route_table.private_route_table.id
}
9. Create Security Groups
Private Security Group
resource "aws_security_group" "private_sg" {
  vpc_id = aws_vpc.my_vpc.id
  tags = {
    Name = "private_sg"
  }
  egress {
    from_port   = 0
    to_port     = 0
    protocol    = "-1"
    cidr_blocks = ["0.0.0.0/0"]
  }
  ingress {
    from_port   = 0
    to_port     = 0
    protocol    = "-1"
    cidr_blocks = []
  }
}
The private security group allows all outbound traffic but no inbound traffic.
Public Security Group
resource "aws_security_group" "public_sg" {
  vpc_id = aws_vpc.my_vpc.id
  tags = {
    Name = "public_sg"
  }
  egress {
    from_port   = 0
    to_port     = 0
    protocol    = "-1"
    cidr_blocks = ["0.0.0.0/0"]
  }
  ingress {
    from_port   = 0
    to_port     = 0
    protocol    = "-1"
    cidr_blocks = ["0.0.0.0/0"]
  }
}
The public security group allows all inbound and outbound traffic.
10. Output Values
output "vpc_id" {
  value = aws_vpc.my_vpc.id
}

output "public_subnet_id" {
  value = aws_subnet.public_subnet.id
}

output "private_subnet_id" {
  value = aws_subnet.private_subnet.id
}

output "nat_gateway_id" {
  value = aws_nat_gateway.my_nat_gateway.id
}
These output values provide important information about the resources created, which can be useful for integration with other configurations or for troubleshooting.
Applying the Configuration
- Initialize Terraform: Run
terraform initto initialize the working directory containing the configuration files. - Plan the Deployment: Run
terraform planto see what changes will be made. This step helps verify the configuration before applying. - Apply the Configuration: Run
terraform applyto create the resources defined in the configuration file. Confirm the action when prompted.
Conclusion
In this blog post, we have covered how to set up a VPC with public and private subnets using Terraform. This setup provides a secure and scalable network architecture with internet access capabilities for both public and private instances. By following these steps, you can ensure your AWS environment is well-structured and ready for deploying various applications.
Feel free to adjust the CIDR blocks, availability zones, and other parameters based on your specific requirements. With Terraform, you can easily manage and scale your infrastructure as your needs evolve.


